
When I was a Salesforce developer, I frequently worked with small internal teams within larger organizations. Since traditional AI solutions require large amounts of data and specialized infrastructure to function properly, utilizing AI capabilities was something that a small compliance department or customer service team wouldn’t even consider.
Now with services such as Cohere, you can fine-tune pre-trained Large Language Models (LLMs) and use Patterns to provide easy-to-configure data orchestration with no infrastructure required. No matter what budget or available resources, small teams no longer need to be left behind in the AI revolution and can take advantage of these powerful tools to improve their operations and decision-making.
In this article, I’ll explain how to quickly set up a Salesforce Case classifier using an LLM such as GPT-3. While this is a common use case for AI within Salesforce, this example can be applied to other AI solutions as well.
Goal
In this post, we will use Patterns to fetch data from Salesforce, fine-tune an LLM with Cohere and finally classify Salesforce and upload those classifications back to Salesforce. In the end, we will have built this Salesforce Case Classifier in Patterns. Feel free to clone this one and configure it yourself if you’d like to build it from scratch.
Prerequisites
- A Salesforce account (A developer edition can be signed up for free)
- A Patterns account
- A Cohere account and API key
- Basic understanding of Python and Apex
Import training data into Patterns
Open up Patterns and create a new app (call it anything you’d like)
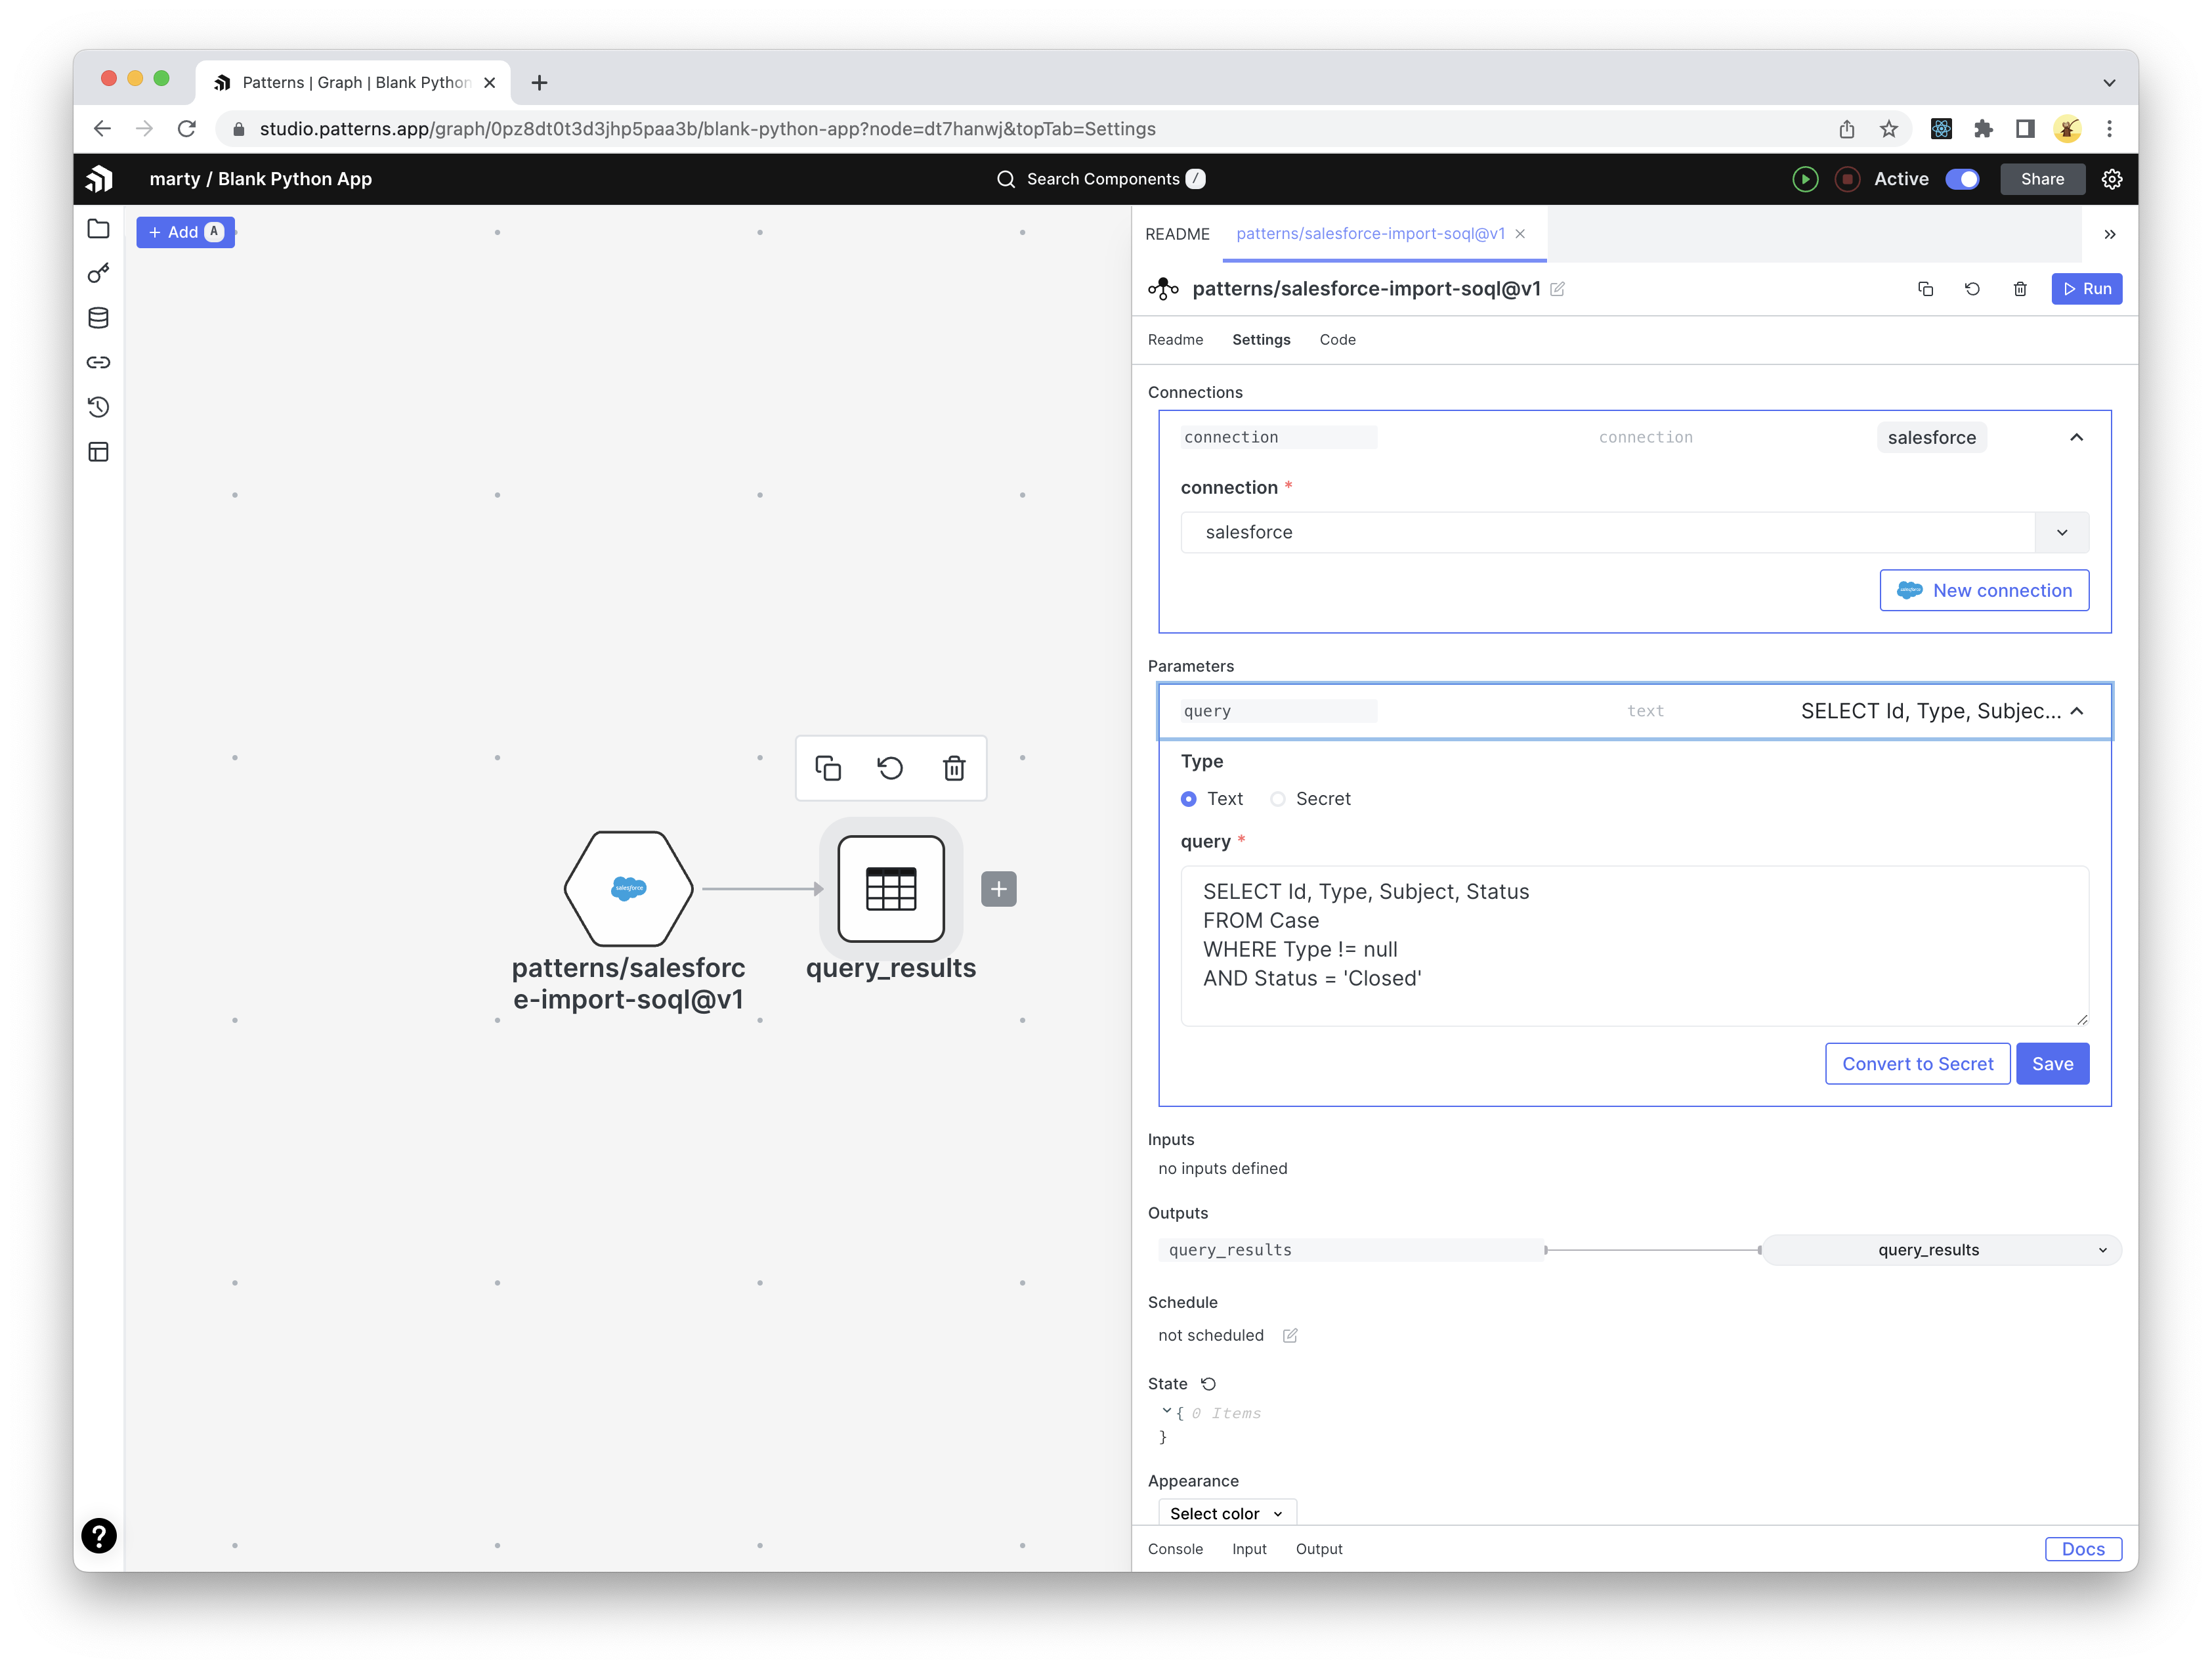
Inside your graph, click “Search Components” in the nav bar to open up our Marketplace and find a node called “Query Salesforce (SOQL)”
Add this component to your graph and configure the following:
- Configure
connectionto your salesforce connection if one exists. If not, click “Connect to Salesforce” - Set the
queryto:
SELECT Id, Type, Subject, Status
FROM Case
WHERE Type != null
AND Status = 'Closed'- Configure
Rename the output table “salesforce_training”
Once configured with a Salesforce connection, your app should look like this.
Configure a webhook for incoming Cases to be classified
Patterns provides the ability to trigger graph nodes from a webhook. Unfortunately, Salesforce does not have webhooks support but we can get around this with a little bit of Apex.
Patterns setup
- First, let’s start by adding a “Webhook” component in Patterns by clicking the “Add” button in the top left, selecting “Webhook” and placing it on the graph
- Open the webhook component and copy its unique URL (we’ll need this later)
Salesforce setup
- Start by adding a “Remote Site Setting” by going to Setup > Security > Remote Site Settings and adding an entry for
https://api.patterns.app - Next, we need to add the following Apex class. You will need to replace
https://api-staging.patterns.app/api/v1/webhooks/your-webhookwith the URL we copied earlier (see step 2)
public class Patterns
{
    @future(callout=true)
    public static void sendToPatterns(Set<Id> caseIds) {
        List<Case> cases = [SELECT Id, Subject FROM Case WHERE Id IN: caseIds];

        HttpRequest request = new HttpRequest();
        request.setEndpoint('https://api-staging.patterns.app/api/v1/webhooks/your-webhook');
        request.setMethod('POST');
        request.setHeader('Content-Type', 'application/json');
        request.setBody(JSON.serialize(cases));

        Http http = new Http();
        http.send(request);
    }
}
- Finally, create a new Apex trigger to execute our previous class on Case creation.
trigger CaseClassifier on Case (after insert) {
    if(!Trigger.new.isEmpty()) {
        Patterns.sendToPatterns(Trigger.newMap.keySet());
    }
}
Patterns setup
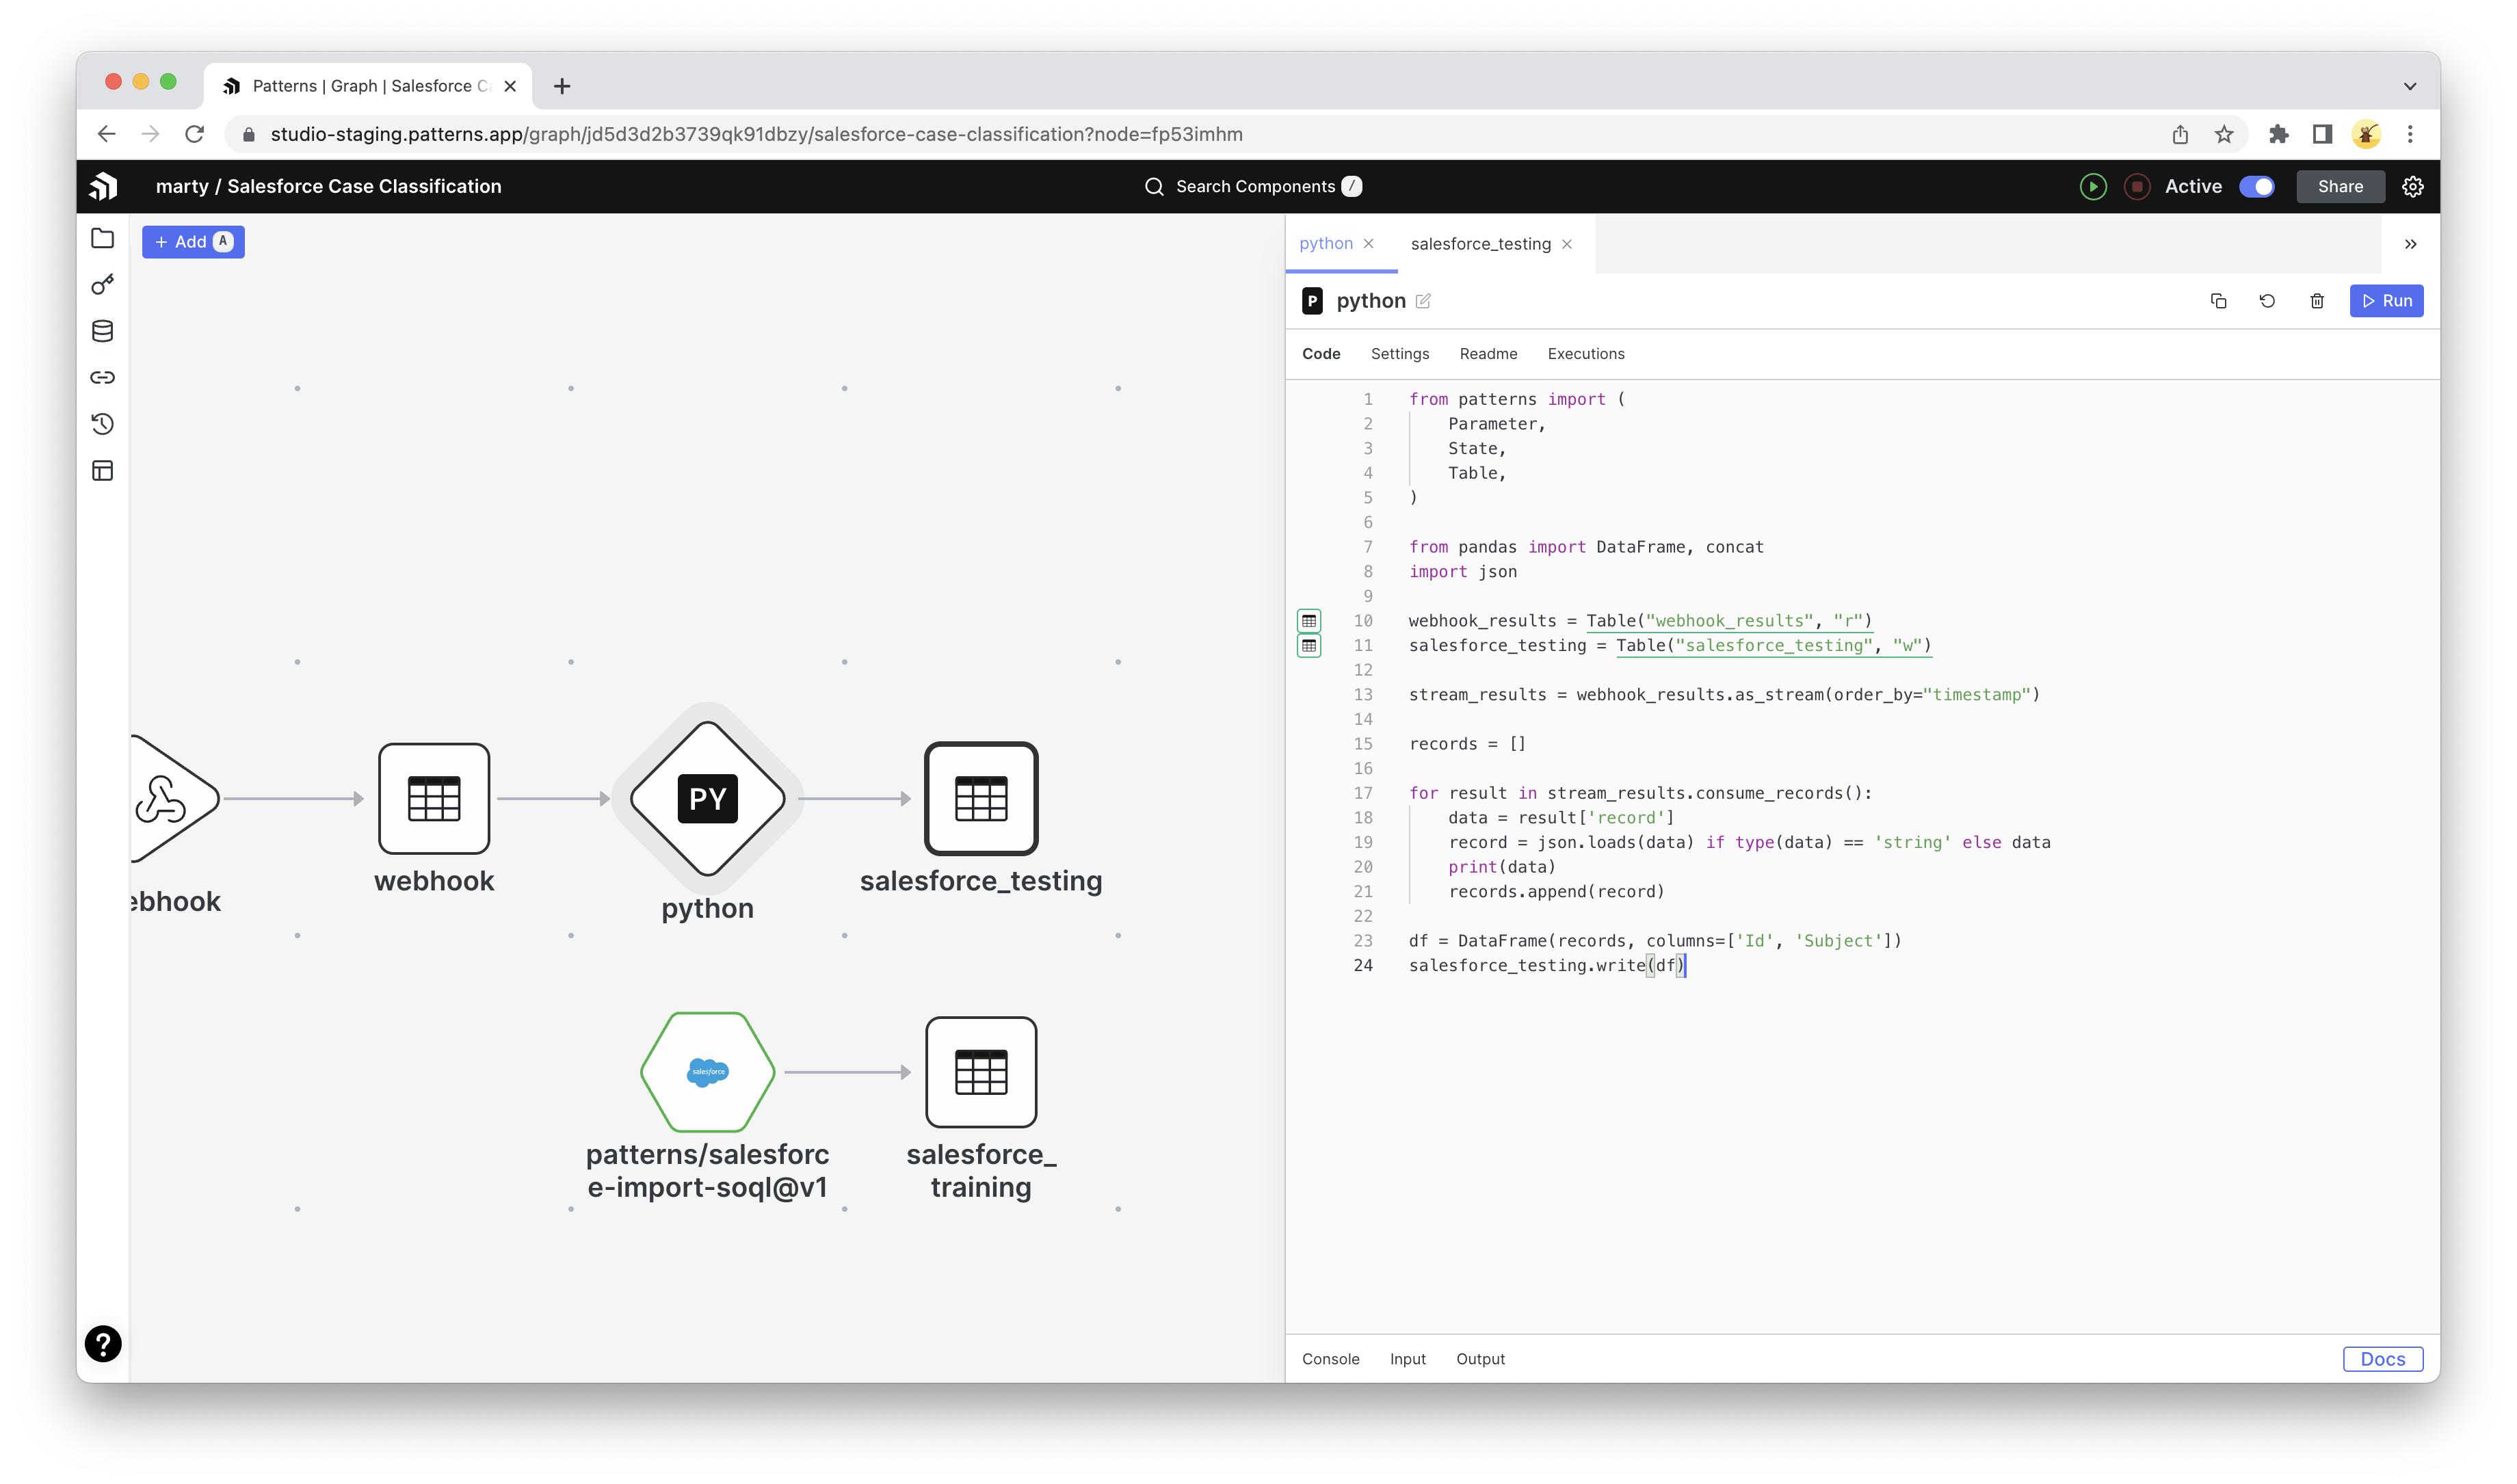
Back in Patterns, we will now need to do some cleanup with the records we receive through our webhook.
- Add a new Python component and paste the following code
from patterns import (
    Parameter,
    State,
    Table,
)

from pandas import DataFrame, concat
import json

webhook_results = Table("webhook_results", "r")
salesforce_testing = Table("salesforce_testing", "w")

stream_results = webhook_results.as_stream(order_by="timestamp")

records = []

for result in stream_results.consume_records():
    data = result['record']
    record = json.loads(data) if type(data) == str else data
    print(data)
    records.append(record)

df = DataFrame(records, columns=['Id', 'Subject'])
salesforce_testing.write(df)
- Configure your new python component by connecting the
webhook_resultsto the webhook table. - For the
salesforce_testingtable, we’ll need to create a new table component. Click the dropdown in the editor gutter and select the “create Table Store” option.
Your graph should now look like this:
Cohere setup
Now that we have our training and testing data, let’s set up the classifier
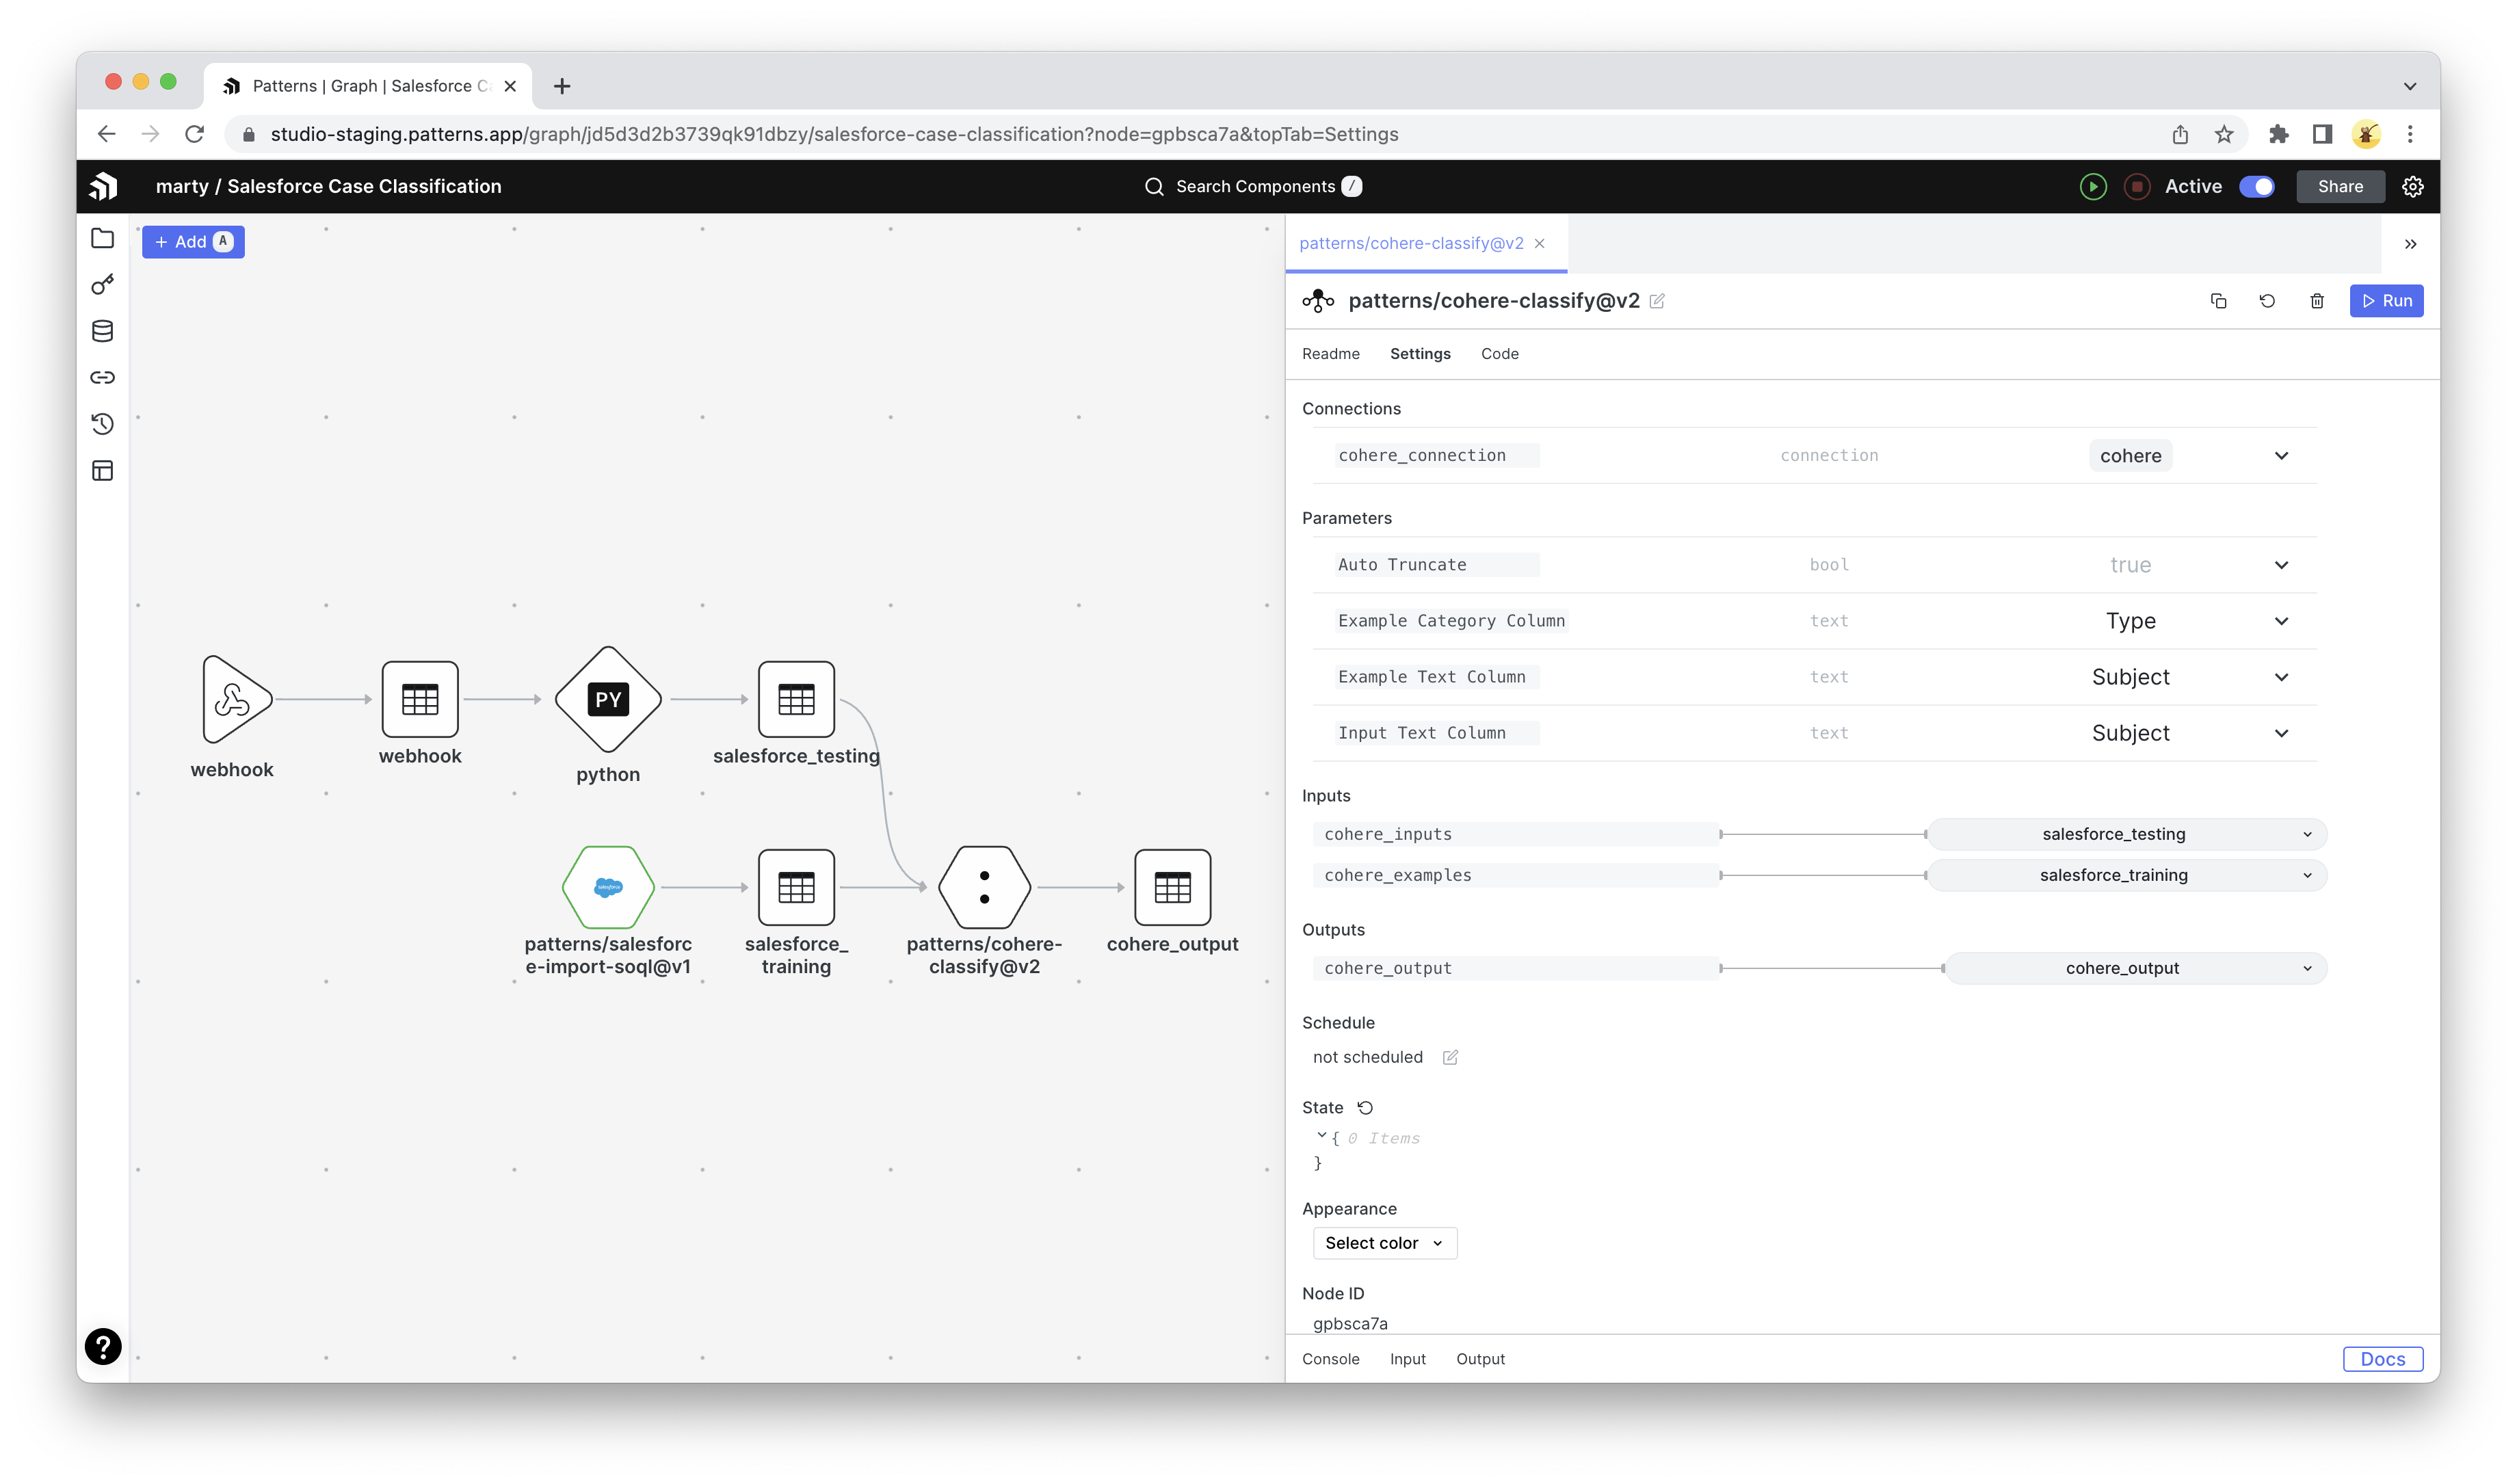
- Go back to the Marketplace and search for a component called “Cohere Classify”
- Add the component to the graph and configure:
Example Category Column= “Type”Example Text Column= “Subject”Input Text Column= “Subject”- Connect
cohere_inputto the “salesforce_testing” table - Connect
cohere_examplesto the “salesforce_training” table
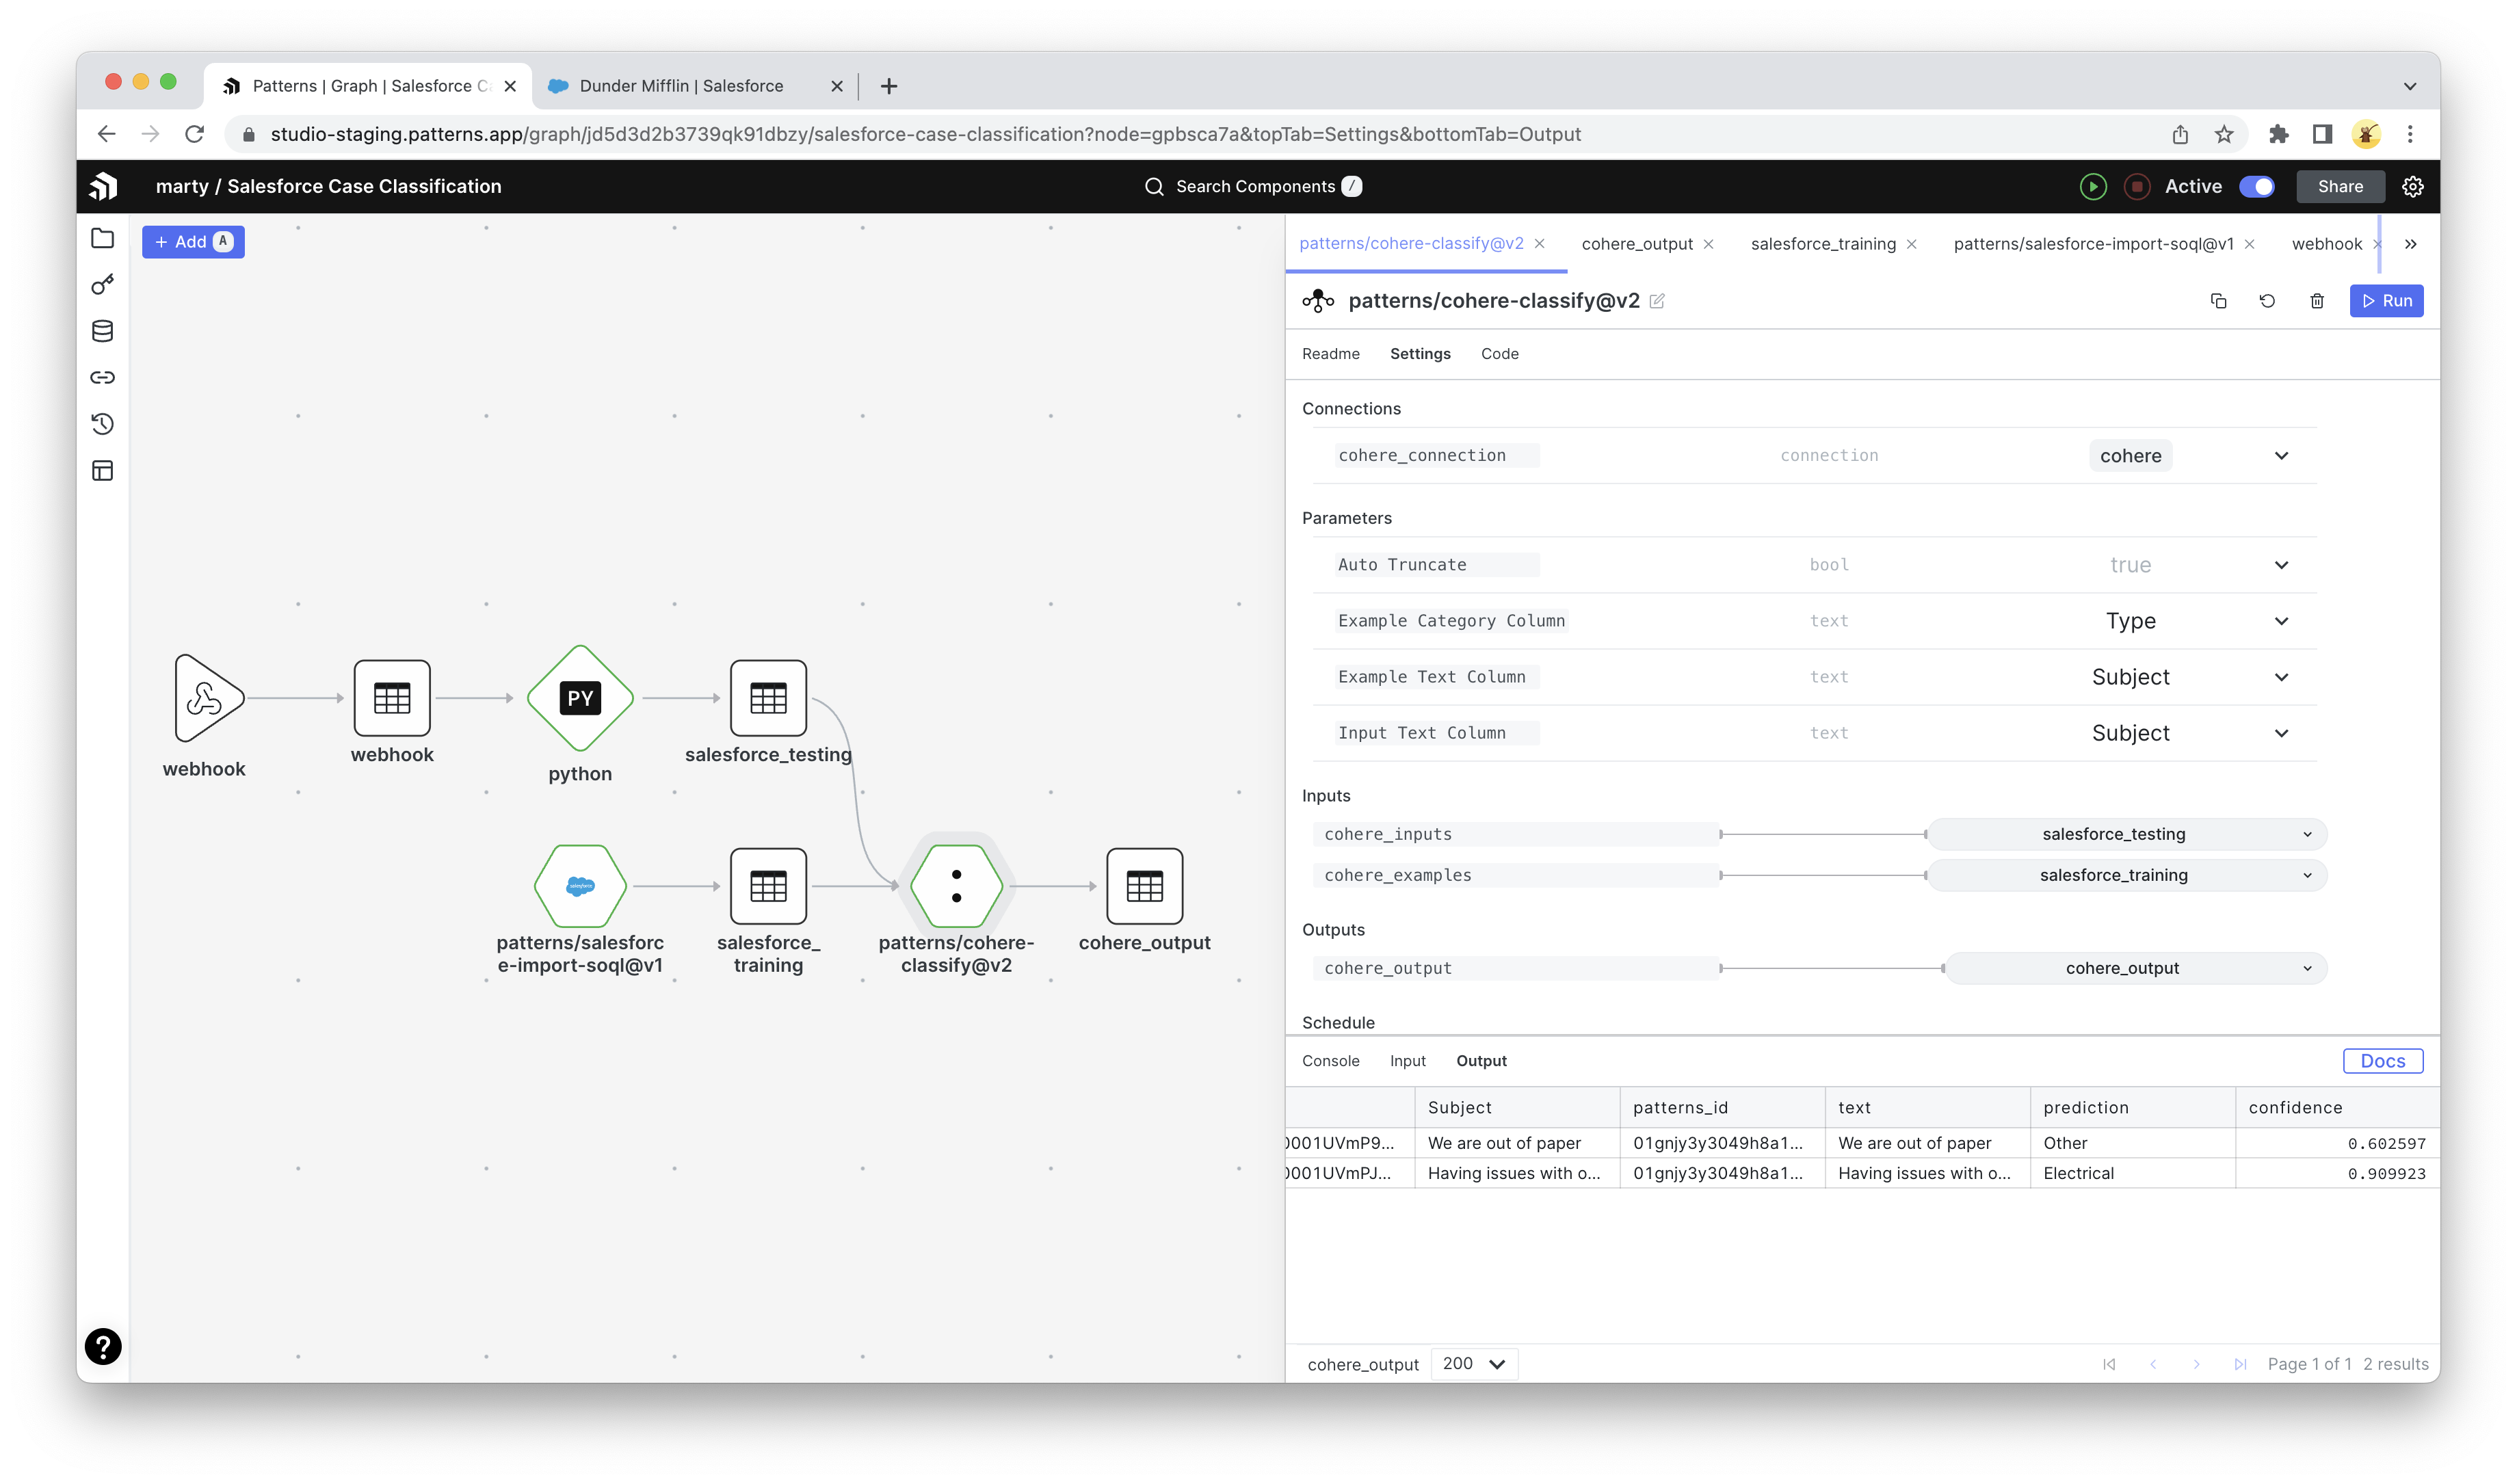
In this example, we are classifying Cases based on the “Subject” field and predicting what “Type” it should be. However, free feel to configure whatever fields you like. The finished graph should look like this.
Running the graph
Now that you’re all set, time to run our graph. Assuming your Salesforce org already has Cases we can train with, hover over the SOQL node and click the “Run” button (looks like a Play icon). This will run the graph and send our training data to Cohere.
We won’t see any output, so let’s see the result of our work by going back into our Salesforce org and create a new Case, such as the one below:
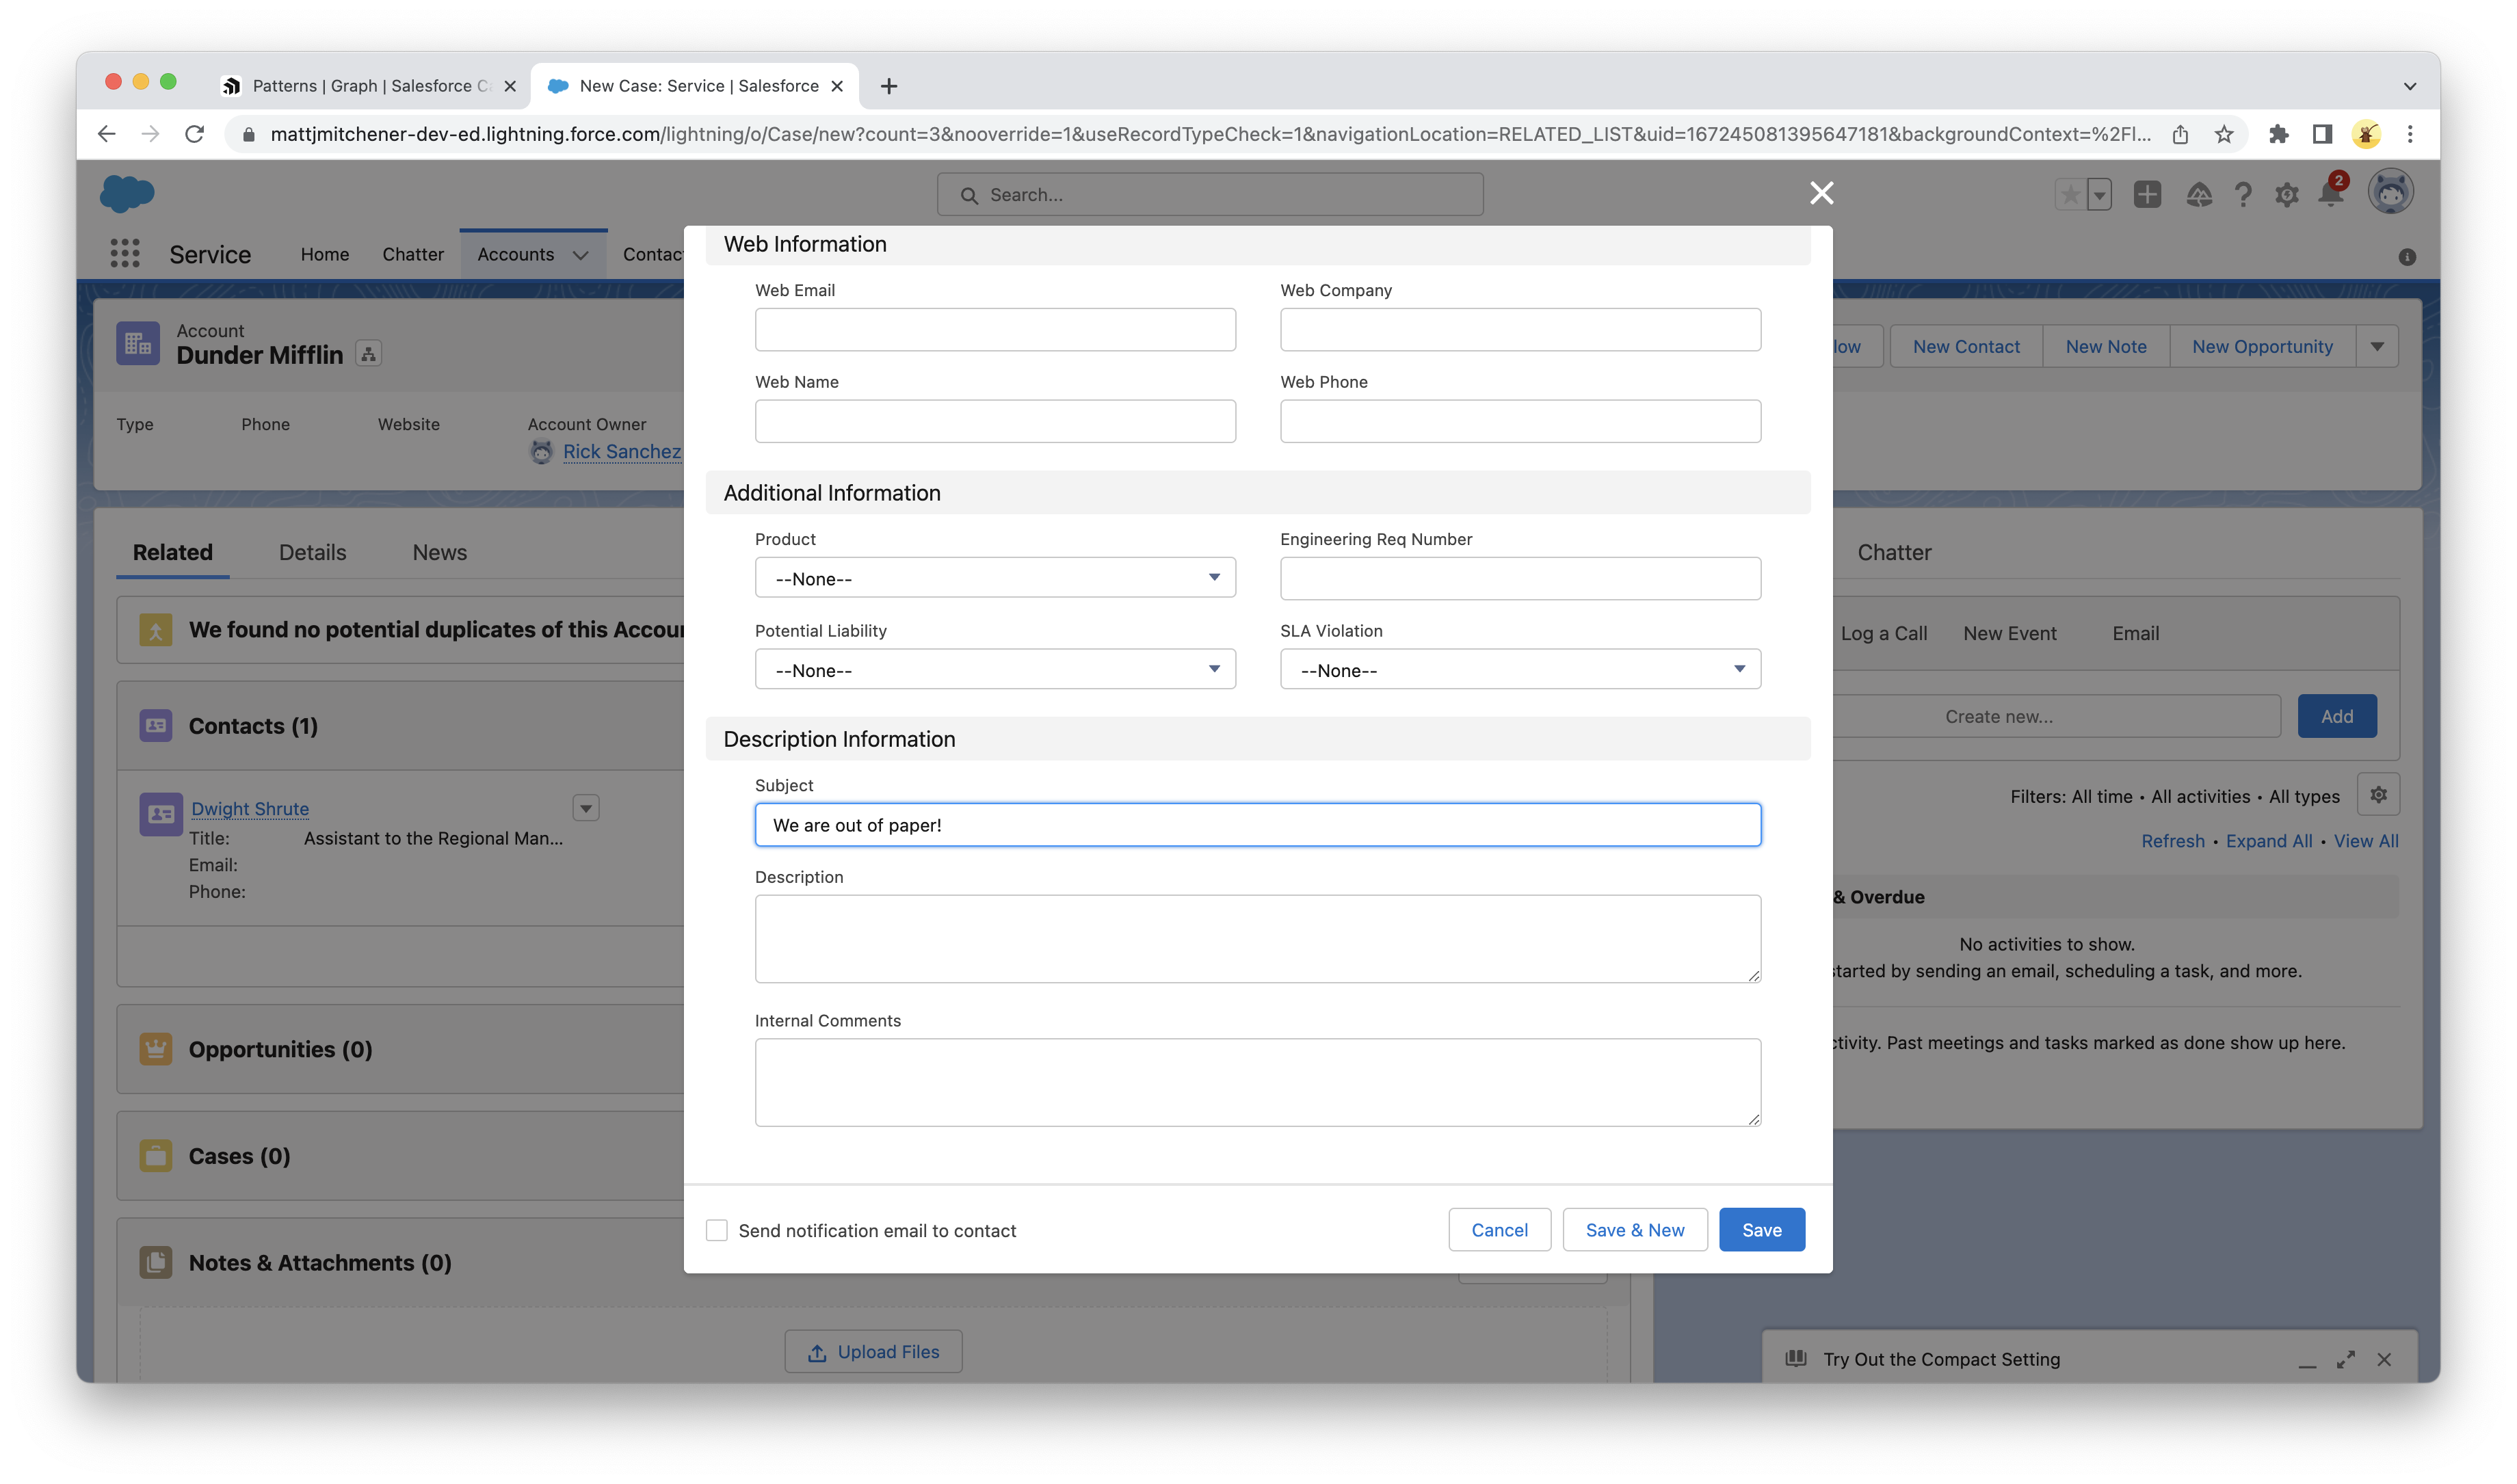
Shortly after creating a case, you should see the Patterns graph come to life.
Our case with the subject “Having issues with power generation” is given a prediction of the type “Electrical” and a confidence score of 0.909923
Exporting to Salesforce
Our final step is to update Salesforce with the results of our classification engine.
- Create a new Python component and copy/paste the following code:
from patterns import (
    Parameter,
    State,
    Table,
    Connection
)

import requests
import json

salesforce = Parameter(
    'salesforce',
    type=Connection("salesforce")
)

access_token = salesforce.get("access_token")
instance_url = salesforce.get("instance_url")

cases = Table('cohere_output')
cases_stream = cases.as_stream()

headers = {"Authorization": f"Bearer {access_token}", "Content-Type": "application/json"}

for c in cases_stream.consume_records():
    case_id=c['Id']
    prediction=c['prediction']
    data={ "Type": c['prediction'] }

    result = requests.patch(
        url=f'{instance_url}/services/data/v56.0/sobjects/Case/{case_id}',
        data=json.dumps(data),
        headers=headers
    )

    result.raise_for_status()
- Finally, configure the Salesforce connection and the table associated with our cohere output
By reading our output as a stream, we will only process one case at a single time. This ensures we update Salesforce opportunistically and not with the entire table every time our graph runs.
Conclusion
By utilizing Patterns and Cohere, we were able to build out a simple but powerful Salesforce Case classifier using an LLM. As we collect more data, we can continuously fine-tune our model by manually re-running the graph or scheduling it with a cron job. Hopefully, this helps you get started with not just Salesforce Case classification but also AI solutions such as text summarization, content moderation, and semantic searching. With a tool like Patterns, stitching this all together and deploying AI solutions has never been simpler.